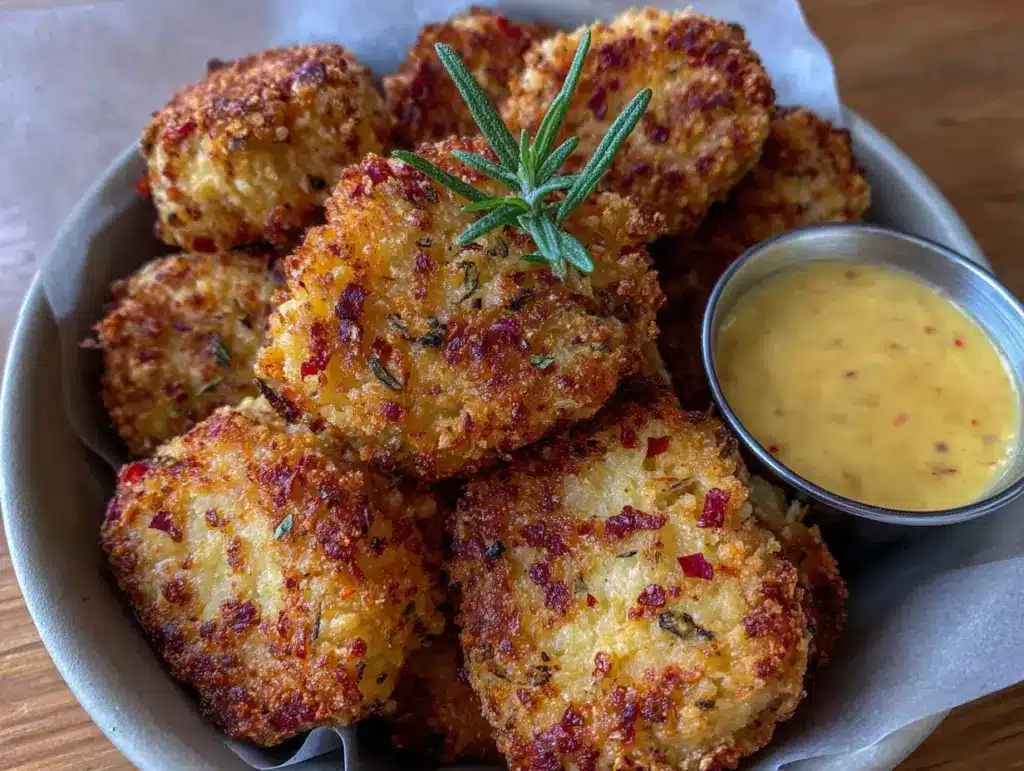
By the fourth time I made these homemade gluten-free chicken nuggets in a single week, I started wondering if I had a problem. Or maybe a solution. It was Tuesday, and I was standing at the counter with flour on my jeans for the third day running—not because I was testing a recipe for work, but because my kid had looked at me after dinner on Friday and said, “These are better than the ones from the drive-through.” And that was it. I couldn’t stop.
The thing about gluten-free chicken nuggets is they have a reputation for being sad. Dry, grainy, dense—the kind of thing you eat because you have to, not because you want to. But this version? It’s the opposite. The coating stays shatteringly crisp even after it cools, and the chicken stays juicy in a way that feels almost unfair for something baked, not fried. I used almond flour and a trick I picked up from making crispy parmesan zucchini fritters—a little Parmesan in the breading changes everything.
And the honey mustard dip. Honestly, I almost didn’t include it in the post because it’s so stupidly simple, but then I remembered: simple is exactly why you need it. It’s creamy, tangy, just sweet enough, and it takes two minutes. The nuggets are the star, but the dip is the reason people ask for the recipe.
These nuggets aren’t trying to be fancy. They’re just trying to be the gluten-free version that actually works. The one you can make on a Tuesday without a special trip to the store. The one your kids will eat without asking what’s in it. And the one you’ll keep making even after you’ve nailed it, because honestly—you won’t want to stop.
Why You’ll Love This Recipe
I’ve tested a lot of gluten-free breading combinations over the years, and this one came from a happy accident. I was out of breadcrumbs and too lazy to go to the store, so I grabbed almond flour and grated Parmesan. The result was so good I never went back. Here’s why this recipe stands out:
- Quick & Easy : From start to table in under 30 minutes. Perfect for those nights when you need dinner on the table before the hangry sets in.
- Simple Ingredients : No obscure gluten-free flours or specialty items. You probably have most of this in your kitchen right now.
- Kid-Approved : My notoriously picky eater actually asked for seconds. Then thirds. Then asked if I could pack them in his lunch.
- Baked, Not Fried : You get all the crunch without the grease or the mess of deep frying. Your oven does all the work.
- Perfect for Meal Prep : They reheat beautifully, which means you can make a double batch and have lunch sorted for days.
What makes these different from every other gluten-free nugget recipe out there? It’s the combination of almond flour and Parmesan in the coating. The almond flour gives you that golden, crispy texture without getting gummy, and the Parmesan adds a savory depth that makes you forget there’s no gluten involved. Plus, the honey mustard dip is the kind of thing you’ll want to put on everything—salads, sandwiches, even crispy honey mustard sheet pan baked chicken thighs.
These nuggets aren’t just good “for gluten-free.” They’re just good. Period. The kind of good that makes you close your eyes after the first bite and forget you were ever missing anything.
What Ingredients You Will Need
This recipe uses simple, wholesome ingredients that work together to create a coating that’s crispy, flavorful, and completely gluten-free. Most of these are pantry staples, and the ones that aren’t are easy to find at any grocery store.
For the Chicken Nuggets
- Chicken breast, 1.5 lbs (680g), cut into bite-sized pieces – Look for organic if you can, but any boneless skinless breast works fine. Pat them dry with paper towels before seasoning—this helps the coating stick better.
- Almond flour, 1 cup (112g) – I prefer Bob’s Red Mill super-fine almond flour for the best texture. Avoid almond meal, which is coarser and won’t give you that even coating.
- Grated Parmesan cheese, ½ cup (50g) – The real stuff from a block, not the green can. The pre-grated stuff has anti-caking agents that mess with the texture.
- Garlic powder, 1 teaspoon – Adds savory depth without being overpowering.
- Onion powder, 1 teaspoon – Rounds out the flavor profile.
- Paprika, 1 teaspoon – Use smoked paprika if you want a subtle smoky flavor.
- Salt, ½ teaspoon – I use fine sea salt.
- Black pepper, ¼ teaspoon – Freshly ground is always better.
- Eggs, 2 large – They act as the glue that holds the coating on. Make sure they’re at room temperature for even coating.
- Olive oil spray – Or avocado oil spray. You need just enough to help the coating crisp up in the oven.
For the Honey Mustard Dip
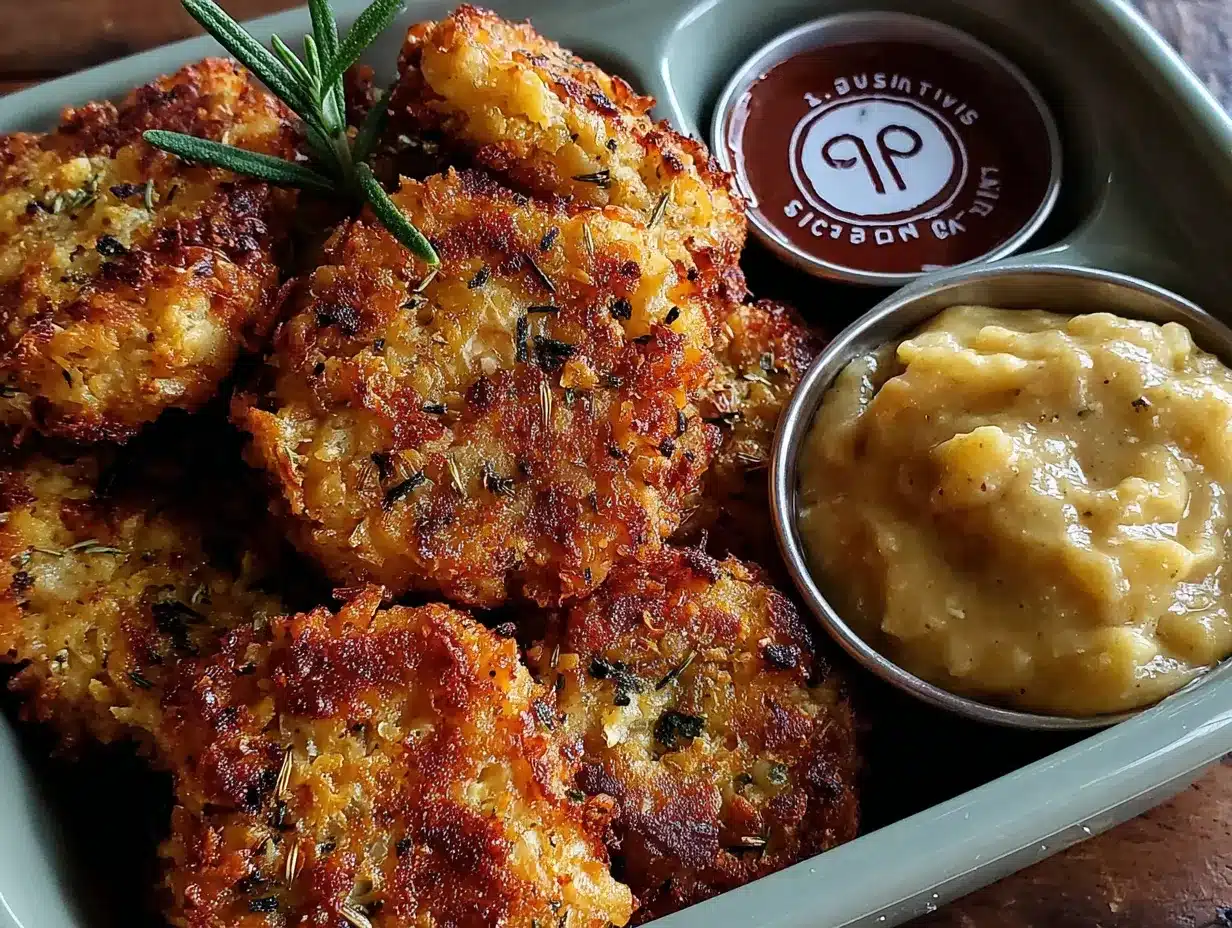
- Mayonnaise, ½ cup (120g) – Full-fat works best here. I like Hellmann’s or Duke’s for their tangy flavor.
- Dijon mustard, 2 tablespoons – Don’t swap this for yellow mustard. Dijon has that sharp, sophisticated tang that makes honey mustard taste restaurant-quality.
- Honey, 2 tablespoons – Local honey if you have it. The flavor is more complex than the supermarket stuff.
- Lemon juice, 1 teaspoon – Fresh is non-negotiable here. Bottled lemon juice tastes flat.
- Salt, a pinch – Just enough to balance the sweetness.
Equipment Needed
- Baking sheet – A half-sheet pan (18×13 inches) works perfectly. Line it with parchment paper for easy cleanup.
- Wire rack – This is the secret to crispy nuggets. Placing the coated chicken on a wire rack set inside the baking sheet allows air to circulate underneath, so the bottoms don’t get soggy. If you don’t have one, flip the nuggets halfway through baking.
- Shallow bowls – You’ll need two: one for the egg wash, one for the dry coating mixture.
- Tongs – For transferring the chicken from the egg wash to the coating without making a mess.
- Cutting board and sharp knife – A good chef’s knife makes cutting the chicken into uniform pieces much easier.
- Small bowl – For mixing the honey mustard dip.
- Measuring cups and spoons – For accuracy. I’ve learned the hard way that eyeballing almond flour doesn’t end well.
I’ve made these nuggets with and without the wire rack, and honestly, the rack makes a noticeable difference. If you don’t have one, just flip the nuggets carefully at the halfway mark. They won’t be quite as crispy on the bottom, but they’ll still be delicious.
Preparation Method
- Preheat your oven to 400°F (200°C). Place a wire rack on a baking sheet and spray it lightly with olive oil spray. This prevents sticking and helps the bottoms get crispy.
- Cut the chicken. Pat the chicken breasts dry with paper towels, then cut them into bite-sized pieces—about 1 to 1.5 inches each. Try to keep them uniform so they cook evenly. Season the pieces lightly with salt and pepper.
- Set up your coating station. In one shallow bowl, whisk the two eggs until they’re smooth and slightly frothy. In another shallow bowl, combine the almond flour, grated Parmesan, garlic powder, onion powder, paprika, salt, and pepper. Whisk until everything is evenly distributed.
- Coat the chicken. Working one piece at a time, dip a chicken piece into the egg wash, letting any excess drip off. Then transfer it to the almond flour mixture, pressing gently so the coating adheres on all sides. Place the coated piece on the prepared wire rack. Repeat with the remaining chicken. This part is a little messy—embrace it.
- Spray the nuggets. Once all the nuggets are on the rack, give them a generous spray with olive oil. This is what makes them golden and crispy instead of pale and sad. Don’t skip this step.
- Bake for 12 minutes. Place the baking sheet in the preheated oven and bake for 12 minutes. The nuggets should be golden on the bottom and starting to brown on top.
- Flip and bake again. Carefully flip each nugget using tongs. Spray lightly again with olive oil. Bake for another 8-10 minutes, until the nuggets are deep golden brown and the internal temperature reaches 165°F (74°C).
- Make the honey mustard dip. While the nuggets are baking, combine the mayonnaise, Dijon mustard, honey, lemon juice, and a pinch of salt in a small bowl. Whisk until smooth. Taste and adjust—add more honey if you like it sweeter, more mustard if you want it tangier.
- Rest and serve. Let the nuggets rest on the rack for 2-3 minutes before serving. This lets the coating set so it stays crispy. Serve warm with the honey mustard dip on the side.
A few things I’ve learned the hard way: Don’t overcrowd the nuggets on the rack. They need space between them for the heat to circulate. And if you’re making a double batch, work in batches and keep the first batch warm in a 200°F oven while you finish the second.
Cooking Tips & Techniques
I’ve made these nuggets at least a dozen times, and I’ve messed up plenty along the way. Here’s what I learned so you don’t have to repeat my mistakes.
Pat the chicken dry. This is the most important step that people skip. Wet chicken makes the coating slide off. I pat each piece with a paper towel before seasoning, and I’ve never had a coating failure since.
Don’t skip the wire rack. I know it’s an extra thing to wash, but it’s the difference between nuggets that are crispy all over and nuggets that are soggy on the bottom. If you absolutely don’t have one, flip the nuggets halfway through and don’t crowd the pan.
Spray generously. The first time I made these, I was stingy with the oil spray because I was trying to be “healthy.” The nuggets came out pale and dry. Now I spray them until the coating looks glossy, and they come out perfectly golden every time.
Check your oven temperature. Ovens run hot or cold, and 25 degrees makes a big difference with something that only bakes for 20 minutes. I use an oven thermometer to make sure mine is actually at 400°F.
Let them rest. I know it’s hard to wait when they smell this good, but letting the nuggets rest for a few minutes on the rack helps the coating set. If you serve them immediately, the coating can be a little fragile.
Double-coat for extra crunch. If you’re feeling extra, you can dip the coated nuggets back into the egg wash and then back into the almond flour mixture. It gives you a thicker, crunchier crust. Just be aware that this adds about 5 minutes to the baking time.
Variations & Adaptations
One of the best things about this recipe is how flexible it is. Here are some of my favorite variations:
Spicy version: Add ½ teaspoon of cayenne pepper and 1 teaspoon of chili powder to the almond flour mixture. For the dip, swap the Dijon mustard for a spicy brown mustard and add a dash of hot sauce.
Air fryer method: Preheat your air fryer to 375°F (190°C). Place the coated nuggets in a single layer in the basket (work in batches if needed). Spray with oil and cook for 8-10 minutes, flipping halfway through, until golden and cooked through. They come out even crispier this way.
Dairy-free option: Replace the Parmesan with ¼ cup of nutritional yeast. It won’t be quite as savory, but it still gives you that umami flavor. Use a dairy-free mayonnaise in the dip.
Chicken thigh version: Swap the chicken breast for boneless skinless thighs. They’re more forgiving and stay juicier. Just increase the baking time by 3-5 minutes since thighs are a little thicker.
Gluten-free panko coating: If you want a more traditional breadcrumb texture, substitute half the almond flour with gluten-free panko breadcrumbs. I like Ian’s brand. The texture is closer to traditional nuggets, but the almond flour version stays crispier longer.
I once made a batch with a little smoked paprika and cumin in the coating, and it tasted like something you’d get at a fancy restaurant. Don’t be afraid to experiment with your spice cabinet.
Serving & Storage Suggestions
These nuggets are best served warm, right after they come out of the oven. The coating is at its crispiest for the first 30 minutes, so I try to time them so they’re ready when everyone’s at the table.
What to serve with them: These nuggets pair beautifully with a simple green salad, roasted vegetables, or sweet potato fries. I also love serving them with healthy sheet pan chicken with roasted zucchini and lemon herb sauce for a complete meal. For a kid-friendly plate, add some carrot sticks and apple slices on the side.
Storage: Let any leftover nuggets cool completely, then store them in an airtight container in the refrigerator for up to 4 days. The honey mustard dip will keep in a sealed jar in the fridge for up to a week.
Reheating: The microwave will make them soggy—don’t do it. Instead, reheat them in a 375°F (190°C) oven for 5-7 minutes, or in an air fryer at 350°F (175°C) for 3-4 minutes. They’ll come out almost as crispy as the first time.
Freezing: These nuggets freeze beautifully. Arrange them in a single layer on a baking sheet and freeze until solid, then transfer to a freezer bag. They’ll keep for up to 3 months. To reheat, bake from frozen at 400°F (200°C) for 15-18 minutes, flipping halfway through.
The flavors actually meld together a bit after a day in the fridge, which makes leftovers almost better than the original. The coating softens slightly, but the flavor deepens.
Nutritional Information & Benefits
Here’s the approximate nutritional breakdown for one serving (about 6 nuggets with 2 tablespoons of dip):
- Calories: 385
- Protein: 34g
- Fat: 24g
- Carbohydrates: 8g
- Fiber: 3g
- Sugar: 4g
These nuggets are naturally gluten-free, low-carb, and keto-friendly. The almond flour provides healthy fats and a good amount of vitamin E, while the chicken breast is an excellent source of lean protein. The Parmesan adds a little calcium, and the eggs contribute choline, which is great for brain health.
Compared to fast-food chicken nuggets, these have significantly less sodium, no preservatives, and none of the weird additives you find in frozen versions. Plus, you control the quality of the ingredients. I use organic chicken and pasture-raised eggs when I can, but even with conventional ingredients, these are a much better choice than anything from a drive-through.
If you’re watching your sodium, you can reduce the salt in the coating and use a low-sodium mayonnaise in the dip. The flavor will still be great.
Conclusion
These homemade gluten-free chicken nuggets are the kind of recipe that makes you wonder why you ever bought the frozen ones. They’re crispy, juicy, and full of flavor—everything you want from a chicken nugget, without the gluten or the guilt.
What I love most about this recipe is how adaptable it is. You can make it spicy, smoky, or classic. You can bake it, air fry it, or even pan-fry it. You can serve it to kids who don’t know it’s gluten-free or to adults who appreciate a good homemade nugget. It works for every occasion.
I’d love to hear how these turn out for you. Did you try a variation? Did your kids gobble them up? Drop a comment below and let me know—I read every single one. And if you snap a photo, tag me on Pinterest so I can see your crispy, golden creations.
Go make these nuggets. Your weeknight dinners are about to get a whole lot better.
Frequently Asked Questions
Can I use coconut flour instead of almond flour?
I wouldn’t recommend it. Coconut flour is much more absorbent and will give you a dry, crumbly coating. If you need a nut-free option, try using gluten-free oat flour or sunflower seed flour instead.
Why did my coating fall off?
This usually happens for one of three reasons: the chicken wasn’t patted dry, the egg wash was too thin, or the nuggets were moved too soon after baking. Make sure you’re patting the chicken dry, letting excess egg drip off, and letting the nuggets rest for a couple of minutes after baking.
Can I make these ahead of time for a party?
Absolutely. You can coat the nuggets up to 24 hours in advance and keep them on the baking sheet in the refrigerator. Just add a few minutes to the baking time since they’ll be starting from cold. Or bake them fully and reheat just before serving.
How do I make the nuggets extra crispy?
Use the wire rack, spray generously with oil, and don’t skip the flip halfway through. You can also try double-coating them or adding a tablespoon of gluten-free panko to the almond flour mixture for extra crunch.
Is this recipe safe for celiac disease?
Yes, as long as you use certified gluten-free almond flour and check that your other ingredients (especially the mustard and mayonnaise) are labeled gluten-free. Some brands of Dijon mustard can contain trace amounts of gluten from vinegar processing, so always read the label.
Pin This Recipe!

Homemade Gluten-Free Chicken Nuggets with Easy Honey Mustard Dip

These homemade gluten-free chicken nuggets are crispy, juicy, and full of flavor, made with almond flour and Parmesan for a shatteringly crisp coating. Paired with a quick honey mustard dip, they’re a kid-approved, baked alternative to fast food that’s ready in under 30 minutes.
- Prep Time: 10 minutes
- Cook Time: 20 minutes
- Total Time: 30 minutes
- Yield: 4 servings 1x
- Category: Main Course
- Cuisine: American
Ingredients
- 1.5 lbs (680g) chicken breast, cut into bite-sized pieces
- 1 cup (112g) almond flour
- ½ cup (50g) grated Parmesan cheese
- 1 teaspoon garlic powder
- 1 teaspoon onion powder
- 1 teaspoon paprika
- ½ teaspoon salt
- ¼ teaspoon black pepper
- 2 large eggs
- Olive oil spray
- ½ cup (120g) mayonnaise
- 2 tablespoons Dijon mustard
- 2 tablespoons honey
- 1 teaspoon lemon juice
- Pinch of salt
Instructions
- Preheat your oven to 400°F (200°C). Place a wire rack on a baking sheet and spray it lightly with olive oil spray.
- Pat the chicken breasts dry with paper towels, then cut them into bite-sized pieces—about 1 to 1.5 inches each. Season the pieces lightly with salt and pepper.
- In one shallow bowl, whisk the two eggs until smooth and slightly frothy. In another shallow bowl, combine the almond flour, grated Parmesan, garlic powder, onion powder, paprika, salt, and pepper. Whisk until evenly distributed.
- Working one piece at a time, dip a chicken piece into the egg wash, letting any excess drip off. Then transfer it to the almond flour mixture, pressing gently so the coating adheres on all sides. Place the coated piece on the prepared wire rack. Repeat with the remaining chicken.
- Once all the nuggets are on the rack, give them a generous spray with olive oil.
- Bake for 12 minutes. The nuggets should be golden on the bottom and starting to brown on top.
- Carefully flip each nugget using tongs. Spray lightly again with olive oil. Bake for another 8-10 minutes, until the nuggets are deep golden brown and the internal temperature reaches 165°F (74°C).
- While the nuggets are baking, combine the mayonnaise, Dijon mustard, honey, lemon juice, and a pinch of salt in a small bowl. Whisk until smooth. Taste and adjust.
- Let the nuggets rest on the rack for 2-3 minutes before serving. Serve warm with the honey mustard dip on the side.
Notes
Pat the chicken dry to help the coating stick. Use a wire rack for maximum crispiness. Spray generously with oil for golden color. Let nuggets rest after baking to set the coating. For extra crunch, double-coat the nuggets. Store leftovers in the refrigerator for up to 4 days; reheat in the oven or air fryer.
Nutrition
- Serving Size: About 6 nuggets with
- Calories: 385
- Sugar: 4
- Fat: 24
- Carbohydrates: 8
- Fiber: 3
- Protein: 34
Keywords: gluten-free chicken nuggets, homemade chicken nuggets, baked chicken nuggets, honey mustard dip, gluten-free recipe, kid-friendly dinner, easy weeknight meal