There’s just something magical about biting into a soft, buttery cookie with a surprise pocket of vibrant berry or apricot jam in the center. The first time I made these Spring Blossom Thumbprint Cookies, the kitchen filled with the sweet scent of vanilla and warm sugar—honestly, it felt like spring had moved right into my home. I remember standing by the oven, peeking through the door as the cookies puffed up and their jam centers glistened like little jewels. It’s a moment I look forward to every year as the weather warms up and I start craving cheerful, easy bakes.
These berry & apricot jam thumbprint cookies are inspired by the classic treats my grandma used to make, but with a fresh twist. I’ve played around with the recipe so many times—swapping flours, mixing jams, even doubling the vanilla. After a dozen trials (and a few burnt batches, let’s be honest), I’ve landed on the perfect combination: crisp edges, a tender crumb, and just enough fruit to make every bite sing. My kids call them “springtime buttons,” and that name just stuck.
Why make these? For one, they’re a breeze to whip up, even if you’re not a seasoned baker. They’re also the prettiest cookies on any dessert table—seriously, they look like edible flowers. If you’ve got a brunch, picnic, or just want to brighten up your afternoon coffee, these thumbprint cookies bring all the sunshine you need. Plus, they’re easy to customize for any jam or fruit spread you love. Whether you’re baking with the family or looking for a quick treat to share, these Spring Blossom Thumbprint Cookies deliver comfort, nostalgia, and a burst of fruity joy in every bite.
Why You’ll Love This Spring Blossom Thumbprint Cookie Recipe
- Quick & Easy: No need to chill the dough—these are ready in under 30 minutes from start to finish. Perfect for those days when a sweet craving hits out of nowhere.
- Simple Ingredients: You probably have everything you need in your pantry right now. No fancy ingredients, just good old-fashioned baking staples.
- Perfect for Spring Gatherings: These cookies are a showstopper at brunches, tea parties, baby showers, or even as a sweet gift for your neighbors.
- Crowd-Pleaser: I’ve tested these on picky eaters, cookie snobs, and even jam skeptics—everyone goes back for seconds.
- Unbelievably Delicious: The combination of buttery shortbread and tart-sweet jam is pure comfort food. I dare you not to close your eyes on the first bite!
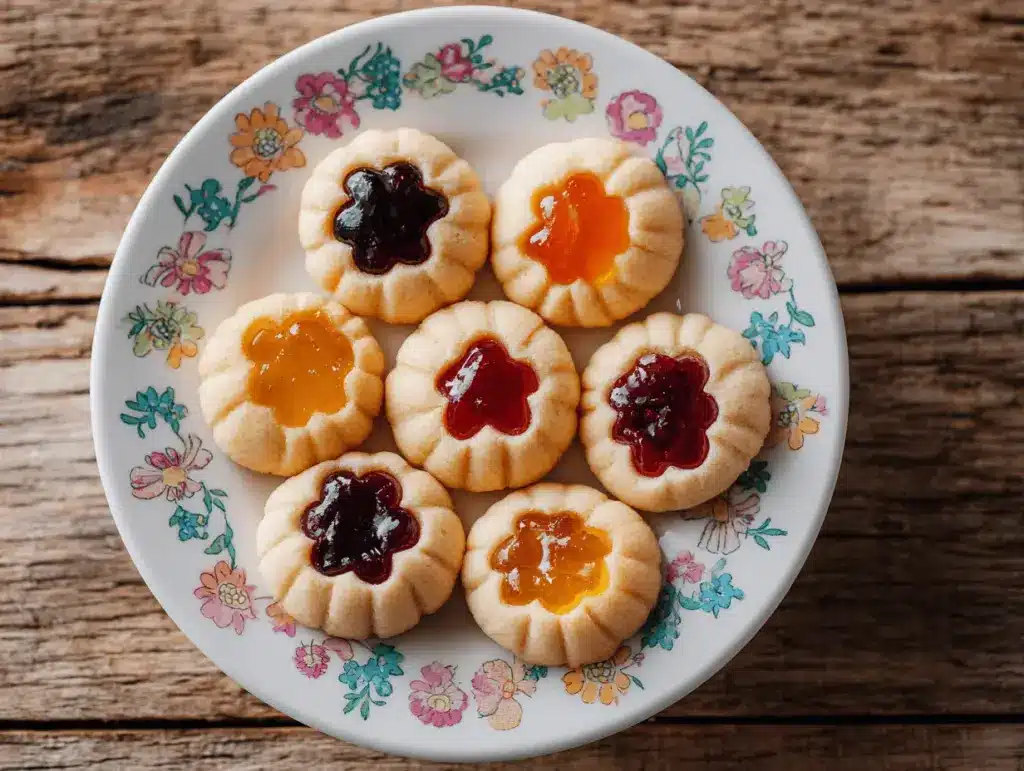
What really sets these Spring Blossom Thumbprint Cookies apart is the texture—crisp around the edges but soft and melt-in-your-mouth in the center. I use a touch of almond extract alongside vanilla for a subtle, nutty depth (totally optional, but highly recommended). The jam is the star, so pick a good one! I usually go with a homemade berry preserve and a classic apricot jam for the best color contrast and flavor.
Let’s face it, not every cookie recipe gets a spot in my “make again” binder. But this one? It’s earned a permanent place. I’ve even caught myself sneaking one for breakfast—hey, there’s fruit in there, right?
If you want a fuss-free, utterly delightful cookie that tastes like sunshine and looks Pinterest-perfect, these Spring Blossom Thumbprint Cookies are the answer. Make a batch for your next get-together or just because you deserve a treat. Trust me, you’ll be hooked.
What Ingredients You Will Need
This recipe uses simple, wholesome ingredients to deliver bold flavor and a satisfying, tender texture—no weird additives or hard-to-find products. Here’s exactly what you’ll need for your Spring Blossom Thumbprint Cookies:
- For the Cookie Dough:
- Unsalted butter, softened (1 cup / 226g) – Room temperature is key for that creamy, fluffy base. I prefer Kerrygold for an extra rich flavor.
- Granulated sugar (2/3 cup / 130g) – Adds sweetness and helps with that perfect golden edge.
- Egg yolks (2 large) – Just the yolks! They add richness and a lovely yellow hue.
- Pure vanilla extract (2 tsp / 10ml) – Go for real vanilla, not imitation. You’ll taste the difference.
- Almond extract (1/2 tsp / 2.5ml, optional) – Just a splash for a delicate, bakery-style fragrance.
- All-purpose flour (2 cups / 250g) – King Arthur or Bob’s Red Mill are my go-to brands for consistent results.
- Fine sea salt (1/2 tsp / 3g) – Balances the sweetness. Table salt works in a pinch.
- For the Filling:
- Berry jam or preserves (about 1/4 cup / 80g) – Raspberry, strawberry, or mixed berry. Choose a thick, chunky jam for best results.
- Apricot jam (about 1/4 cup / 80g) – The tartness is a perfect foil for the buttery cookie.
- For Decoration (optional):
- Powdered sugar (for dusting) – A little sprinkle makes them look extra special.
- Fresh edible flowers or dried petals (like violets or rose petals) – Totally optional, but so lovely for spring parties.
Ingredient Tips:
- If you want a gluten-free version, swap the all-purpose flour for a 1:1 gluten-free baking blend (I’ve had good luck with Cup4Cup).
- Dairy-free? Use vegan butter sticks—just make sure they’re not too soft.
- No almond extract? No problem—just use a little extra vanilla.
- Switch up the jams: lemon curd, cherry preserves, or even orange marmalade all work beautifully here.
- For a more rustic, whole-grain cookie, sub in up to 1/2 cup (60g) whole wheat flour.
Most of these ingredients are pantry staples. If you’re feeling adventurous, making your own jam is a fun weekend project, but honestly, a good-quality store-bought jar works just fine.
Equipment Needed
- Baking sheet – A sturdy, rimmed sheet helps prevent cookies from sliding off. I use a heavy-duty aluminum one for even browning.
- Parchment paper or silicone baking mat – Keeps cookies from sticking and makes cleanup painless. If you’re out, greasing the pan lightly works in a pinch.
- Mixing bowls – One large for the dough, one small for the jam. Any medium-sized bowl will do for whisking.
- Hand mixer or stand mixer – For creaming the butter and sugar. You can use a sturdy wooden spoon and elbow grease, but it’ll take longer.
- Measuring cups and spoons – Essential for accuracy in baking. I love my set with clear, bold markings (less squinting!).
- Teaspoon or small cookie scoop – For making even-sized cookies and perfect thumbprint indents. A melon baller works too.
- Wire cooling rack – Helps cookies cool faster and keeps the bottoms crisp.
- Small spoon or piping bag – For filling the centers with jam neatly.
Personal tip: My first few times, I used whatever old cookie sheet I had—sometimes the bottoms browned too fast. Investing in a quality baking sheet really made a difference. Also, don’t forget to occasionally check your mixer’s beaters for stray bits of butter (learned that one the hard way!).
If you’re baking on a budget, dollar store measuring sets and a big mixing bowl will get you just as far—don’t let a lack of fancy gear hold you back!
Preparation Method

-
Preheat and Prep:
- Preheat your oven to 350°F (175°C).
- Line a baking sheet with parchment paper or a silicone baking mat.
-
Cream the Butter and Sugar:
- In a large mixing bowl, beat together 1 cup (226g) unsalted butter and 2/3 cup (130g) granulated sugar.
- Use medium speed for about 2-3 minutes, until the mixture is light and fluffy. If using a hand mixer, you may need another minute.
- Tip: Scrape down the sides with a spatula halfway through to avoid unmixed pockets.
-
Add Egg Yolks and Flavorings:
- Add 2 large egg yolks, 2 teaspoons (10ml) vanilla extract, and 1/2 teaspoon (2.5ml) almond extract (if using).
- Beat until fully combined and creamy—about 1 minute.
-
Incorporate Dry Ingredients:
- In a separate bowl, whisk together 2 cups (250g) all-purpose flour and 1/2 teaspoon (3g) fine sea salt.
- Gradually add the dry mixture to the wet ingredients, beating on low speed or stirring by hand.
- Mix just until a soft dough forms; don’t overwork it or the cookies will be tough.
-
Shape the Cookies:
- Scoop out 1-tablespoon (15g) portions of dough and roll between your palms into smooth balls.
- Place them 2 inches (5cm) apart on the prepared baking sheet.
- Using your thumb or the back of a teaspoon, gently press an indentation into the center of each cookie. The edges might crack a little—that’s totally fine and adds to the rustic charm.
-
Fill with Jam:
- Stir your jams to loosen them if needed.
- Fill half the cookies with about 1/2 teaspoon (2g) berry jam, and the other half with apricot jam. Don’t overfill—they’ll bubble up as they bake.
- Use a small spoon or piping bag for precision. If the dough cracks too much, gently pinch it back together.
-
Bake:
- Bake for 11–13 minutes, or until the edges are just turning golden and the centers are set.
- If your oven runs hot, check at 10 minutes to avoid over-browning.
- The jam will be very hot and bubbly—don’t touch!
-
Cool:
- Let the cookies rest on the baking sheet for 5 minutes, then transfer to a wire rack to cool completely.
- The centers will firm up as they cool, so don’t worry if they seem a bit soft at first.
-
Decorate (Optional):
- Once cooled, dust with powdered sugar for a springtime look.
- Top with edible flowers or petals if you’re feeling fancy.
Troubleshooting:
- If your cookies spread too much, the butter may have been too soft—pop the dough in the fridge for 10 minutes before baking next time.
- Jam overflow? Try using a thicker preserve or filling a little less.
- If the indentations puff up during baking, gently press them again with a teaspoon right after coming out of the oven (use caution—it’s hot!).
These cookies are as forgiving as they are delicious. Even if they’re a little wonky, they’ll taste amazing. Promise.
Cooking Tips & Techniques
After baking more batches of these thumbprint cookies than I can count, I’ve picked up a few tricks and “wish I’d known that” lessons. Here are my best tips for flawless Spring Blossom Thumbprint Cookies every time:
- Don’t Overmix: Once you add the flour, mix just until the dough comes together. Overworking makes tough cookies (and nobody wants that).
- Room Temperature Butter: Soft but not melty butter is key—think “just spreadable.” If it’s too cold, your dough will be crumbly; too warm, and the cookies will spread too much.
- Jam Consistency: Use a thick, spoonable jam or preserves. If yours is runny, simmer for a few minutes to thicken before filling the cookies.
- Uniform Size: Using a cookie scoop or measuring spoon means even baking and prettier results. If you eyeball it (like I did once), you might end up with a few burnt edges!
- Batch Baking: Bake one tray at a time in the center of the oven for the most even heat. If using two trays, rotate halfway through.
- Multitasking: While one tray bakes, shape and fill the next—makes the process much faster.
- Don’t Skip the Cooling: The cookies finish setting as they cool. If you move them too soon, they can fall apart (been there, done that…twice).
Common Mistakes (and How to Fix Them):
- Cookies too dry? Double-check your measurements—flour can pack down and add more than you think. Fluff with a spoon before measuring.
- Jam leaking out? Make slightly deeper wells and use less jam.
- Spread too much? Chill the dough balls for 10 minutes before pressing the thumbprints.
I’ve learned that a little patience goes a long way—especially with letting them cool (even if the jam looks irresistible!). And don’t stress about “perfect”—the rustic look is part of their charm. Every batch just gets better!
Variations & Adaptations
One of the best things about this Spring Blossom Thumbprint Cookie recipe is how easy it is to adapt. Whether you’re working around dietary needs, want a seasonal twist, or simply crave a different flavor, you’ve got options!
- Gluten-Free: Use a 1:1 gluten-free flour blend in place of all-purpose flour. I’ve tried Cup4Cup and King Arthur’s blend—both work beautifully. The cookies might be just a touch more delicate, so handle gently when filling and cooling.
- Vegan: Swap in vegan butter and use 2 tablespoons of unsweetened applesauce or a flax “egg” (1 tbsp ground flax + 2.5 tbsp water, mixed and rested) for the egg yolks. The result is a slightly softer cookie, but still delicious.
- Citrus Twist: Add 1 teaspoon of grated lemon or orange zest to the dough. Pair with lemon curd or orange marmalade for a bright, zesty version—so good for summer!
- Nutty Variation: Roll the dough balls in finely chopped pistachios, almonds, or pecans before pressing the indent. Adds crunch and a bakery vibe.
- Chocolate Lovers: Fill the thumbprints with a dollop of chocolate hazelnut spread or a thick chocolate ganache instead of jam. Sprinkle with sea salt for extra oomph.
- Allergen Swaps: For nut allergies, skip the almond extract and use all vanilla. For egg allergies, use an egg replacer or the flax egg trick above.
Personally, I love to mix up the jams in each batch—half berry, half apricot, and sometimes a rogue cherry or fig. It’s always a hit and makes every plate look extra colorful. Let your mood (or your fridge contents) inspire you!
Serving & Storage Suggestions
These Spring Blossom Thumbprint Cookies are at their absolute best served at room temperature, when the jam is set but still supple and the cookie is buttery-soft with a faint crunch. Presentation-wise, stack them on a cake stand or layer in a pretty tin—if I’m making them for a party, I’ll sprinkle a little powdered sugar and scatter a few edible petals for that Pinterest-ready look.
Pair these cookies with a pot of herbal tea, a cappuccino, or even a glass of cold milk. They play nicely with light spring desserts (think lemon bars or vanilla bean ice cream) and are a charming addition to brunch spreads or baby showers.
Storage:
- Keep cookies in an airtight container at room temperature for up to 4 days. Separate layers with parchment to keep the jam centers from sticking.
- For longer storage, freeze cookies (layered with parchment) in a freezer-safe container for up to 2 months. Thaw at room temperature before serving.
- To refresh day-old cookies, pop them in a 300°F (150°C) oven for 3-4 minutes—this brings back a bit of that just-baked magic.
Honestly, they rarely last more than a couple days in my house, but the jammy centers seem to get even more flavorful after a day or two. If you’re making ahead for a party, bake and freeze; just add the powdered sugar and decorations after thawing.
Nutritional Information & Benefits
Each Spring Blossom Thumbprint Cookie (based on a batch of 28) contains approximately:
- Calories: 110
- Fat: 6g
- Carbohydrates: 13g
- Sugar: 5g
- Protein: 1g
These cookies are a treat, but there are a few hidden perks. The jams add a touch of fruit, and you can up the fiber a little by swapping in whole wheat flour. They’re naturally nut-free (unless you add nuts or almond extract), and can be made gluten-free or vegan as needed. Just watch for allergens in your chosen jam.
From a wellness perspective, I find these cookies satisfy a sweet tooth with just a couple bites. Sharing them with friends or kids always brings a bit of extra joy—sometimes, wellness is all about balance and celebration!
Conclusion
If you’re looking for the cookie that screams “spring,” you’ve found it. These Spring Blossom Thumbprint Cookies with berry and apricot jam are easy, beautiful, and downright addictive. I love them for their flexibility—swap the flavors, make them gluten-free, or double the batch for a crowd. They’re as perfect for a quiet afternoon as they are for a festive gathering.
Give them your own twist—try a new jam, add some citrus, or get creative with decorations. I’ve made these for years and they never go out of style. Honestly, there’s something special about a homemade cookie that looks as joyful as it tastes.
Let me know if you try these! Leave a comment below with your favorite jam combo, or tag me on social media with your cookie creations. Happy baking, and may your kitchen always smell like spring!
FAQs
Can I use any type of jam for these thumbprint cookies?
Yes! Any thick jam, preserve, or fruit spread works well. Just avoid runny jellies, as they can spill over during baking.
How do I keep the jam from running out of the cookies?
Use a thicker jam and don’t overfill the centers. If you notice spreading, try making a deeper well before filling.
Can I make the dough ahead of time?
Definitely. You can prepare the dough, shape it into balls, and refrigerate for up to 24 hours before baking. Let the dough warm slightly before pressing the thumbprints and filling.
Are these cookies freezer-friendly?
Absolutely! Freeze baked cookies in layers with parchment. Thaw at room temperature before serving, then dust with powdered sugar if desired.
What if I don’t have almond extract?
No worries—just use extra vanilla extract, or leave it out entirely. The cookies will still taste amazing!
Pin This Recipe!

Spring Blossom Thumbprint Cookies Easy Berry Apricot Jam Recipe

Soft, buttery thumbprint cookies filled with vibrant berry and apricot jam centers. These easy, cheerful cookies are perfect for spring gatherings, brunches, or a sweet treat with coffee.
- Prep Time: 15 minutes
- Cook Time: 13 minutes
- Total Time: 28 minutes
- Yield: 28 cookies 1x
- Category: Dessert
- Cuisine: American
Ingredients
- 1 cup unsalted butter, softened
- 2/3 cup granulated sugar
- 2 large egg yolks
- 2 teaspoons pure vanilla extract
- 1/2 teaspoon almond extract (optional)
- 2 cups all-purpose flour
- 1/2 teaspoon fine sea salt
- 1/4 cup berry jam or preserves (raspberry, strawberry, or mixed berry)
- 1/4 cup apricot jam
- Powdered sugar, for dusting (optional)
- Fresh edible flowers or dried petals, for decoration (optional)
Instructions
- Preheat your oven to 350°F (175°C). Line a baking sheet with parchment paper or a silicone baking mat.
- In a large mixing bowl, beat together unsalted butter and granulated sugar on medium speed for 2-3 minutes until light and fluffy. Scrape down the sides as needed.
- Add egg yolks, vanilla extract, and almond extract (if using). Beat until fully combined and creamy, about 1 minute.
- In a separate bowl, whisk together all-purpose flour and fine sea salt. Gradually add the dry mixture to the wet ingredients, mixing on low speed or by hand until a soft dough forms. Do not overmix.
- Scoop out 1-tablespoon portions of dough and roll into smooth balls. Place 2 inches apart on the prepared baking sheet.
- Using your thumb or the back of a teaspoon, gently press an indentation into the center of each cookie.
- Stir jams to loosen if needed. Fill half the cookies with about 1/2 teaspoon berry jam, and the other half with apricot jam. Do not overfill.
- Bake for 11–13 minutes, or until edges are golden and centers are set. Check at 10 minutes if your oven runs hot.
- Let cookies rest on the baking sheet for 5 minutes, then transfer to a wire rack to cool completely.
- Once cooled, dust with powdered sugar and decorate with edible flowers or petals if desired.
Notes
For gluten-free cookies, use a 1:1 gluten-free flour blend. Vegan option: substitute vegan butter and use applesauce or flax egg for egg yolks. Use thick jam for best results and avoid overfilling. Cookies can be frozen for up to 2 months; decorate after thawing. Let cookies cool fully before moving to prevent breakage.
Nutrition
- Serving Size: 1 cookie
- Calories: 110
- Sugar: 5
- Sodium: 40
- Fat: 6
- Saturated Fat: 3.5
- Carbohydrates: 13
- Fiber: 0.3
- Protein: 1
Keywords: thumbprint cookies, spring cookies, berry jam cookies, apricot jam cookies, easy cookie recipe, brunch dessert, party cookies, edible flowers, shortbread cookies


